How to Remove an Old Bathroom Sink in 10 Easy Steps (DIY + Professional Tips)
Thinking of upgrading your bathroom? Maybe the sink’s cracked, outdated, or just doesn’t match your new tiles. Whatever the reason, removing an old bathroom sink is often the first step in any renovation project.
Now, if you’re handy with tools and enjoy a bit of weekend DIY, you might be tempted to tackle it yourself and that’s totally doable. But let’s be real: some sinks are trickier than they look. Plumbing can get messy, heavy porcelain isn’t easy to lift solo, and if you live in a Vancouver condo, navigating disposal rules can feel like solving a Rubik’s Cube.
That’s where we come in. At Provident Junk Removal, we offer a professional bathroom sink removal service in Vancouver, helping homeowners, landlords, and renovators dismantle and dispose of old bathroom sinks in the easy way.
Why Your Sink Type Matters More Than You Think
Before you grab a wrench and a YouTube tutorial, it’s helpful to know what kind of sink you’re dealing with. Not all bathroom sinks are created equal as some practically lift themselves off, while others seem glued to the wall with the force of 10,000 bathroom remodels.
Here are the usual suspects we run into in Vancouver homes:
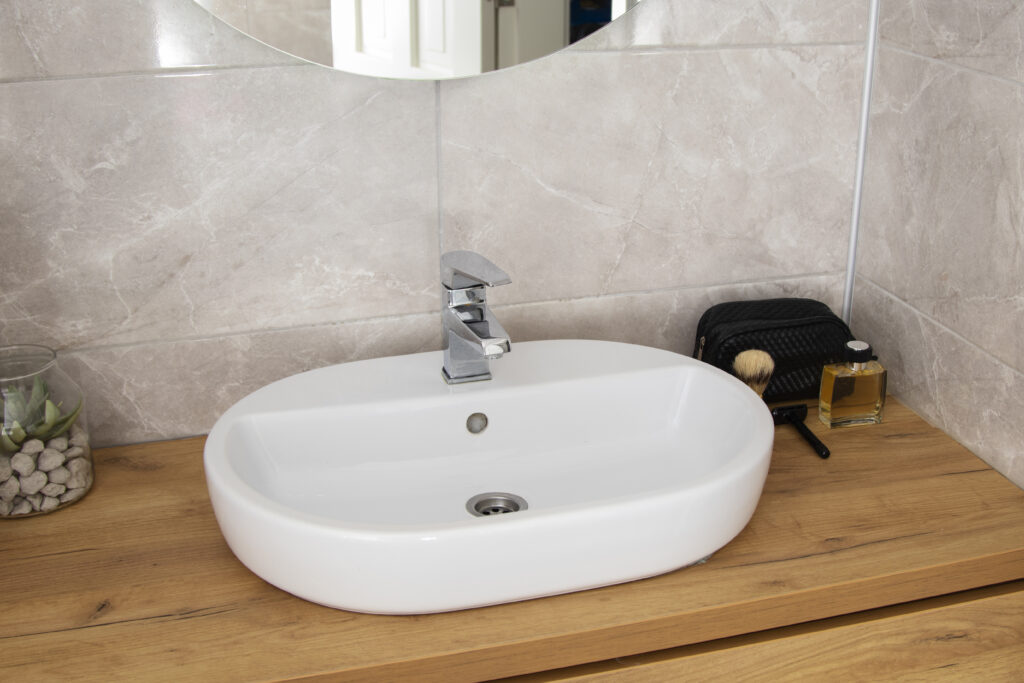
Drop-in sinks are the most common. They sit on top of the counter, making them relatively easy to remove. You just need to cut the sealant and lift them out.
Undermount sinks, on the other hand, are mounted from underneath the countertop. These can be a pain to remove because they’re usually glued in tight. Plus, you risk damaging the counter if you’re not careful.
Pedestal sinks might look delicate, but don’t be fooled because they’re often bolted to the wall and floor, and the plumbing is hidden inside the pedestal. Not always a smooth ride.
Wall-mounted sinks save space but bring their own challenges. You’ll need to unscrew them from wall brackets, and they can be heavier than they look. Gravity is not your friend here.
Vessel sinks are the divas of the sink world as they sit proudly above the counter. Removal is typically straightforward, but because they’re often made of glass or stone, it’s easy to crack one if you’re not careful.
No matter what kind of sink you’ve got, Provident Junk Removal has the tools and experience to safely dismantle and remove old bathroom sinks in Vancouver homes.
How to Remove a Bathroom Sink in 10 Simple Steps
Removing a bathroom sink might sound straightforward, but once you’re crouched on the floor trying to unscrew a rusted P-trap with a flashlight in your mouth, you’ll realize it’s a whole journey. If you’re still up for the challenge, here’s your step-by-step guide to dismantling an old bathroom sink safely and effectively.
Step 1: Set the Stage (and the Mood)
Before you dive under the sink, take a breath and do a quick visual check of your bathroom setup. Where are the shut-off valves? Is your sink mounted or sitting on a vanity? Are you working in a tight space or a roomy ensuite?
This isn’t just about getting the job done as it’s also about making it easier on yourself. Clear off your countertop, lay down an old towel or sheet to catch falling gunk, and maybe even cue up your favourite playlist. (Yes, removing a sink can have a soundtrack.)
If you’re working in a high-rise or older Vancouver home, consider snapping a quick photo of your plumbing setup before starting — helpful in case you need to reconnect things later or explain an “oops” moment to a plumber.
Trust us, setting the right mood now will save you stress later and maybe even keep the swearing to a minimum.
Step 2: Gear Up for the Job
Yes — wear gloves. Even if you’re the “I never wear gloves” type. Under your sink, you’ll find sharp metal edges, mildew, and maybe even a spider or two that’s been paying rent-free for years.
And if your sink has a powered faucet or integrated light, flip the breaker. We love a dramatic renovation, just not one involving sparks.
Step 3: Shut Off the Water Supply
Turn off the hot and cold water valves under the sink by rotating them clockwise. Then, turn the faucet on to release any pressure and confirm the water’s off. If water still flows, you might have to shut it off at the main supply valve for your home.
Trust us — this is not the step to skip.
Step 4: Drain and Disconnect the Plumbing
Place a bucket underneath the pipes to catch any leftover water. Unscrew the water lines going to the faucet using an adjustable wrench. Then, remove the P-trap, the U-shaped section of the pipe, by loosening the slip nuts.
Keep your nose ready, this is where things can get, well… aromatic.
Step 5: Disconnect the Drain Stopper and Tailpiece
Most people forget this step, but it’s important. Reach up under the sink to disconnect the rod or lever connected to your drain stopper (usually attached with a clip or nut). Then unscrew the tailpiece (the vertical pipe from the drain) so it’s not holding anything in place.
This will make removing the rest of the sink way easier later.
Step 6: Break the Seal (Literally)
Time to free the sink from its perch. Use a utility knife to cut through any silicone or caulking around the edge. For drop-in sinks, this might be enough to lift it right out. For undermount sinks, gently work a putty knife or scraper around the edges from below.
Pedestal or wall-mounted sinks may have mounting bolts, remove those with care because the sink might be heavy or the wall might be fragile (hello, Vancouver plaster walls).
Step 7: Remove Mounting Clips, Brackets, or Screws
Not all sinks have them but many do. Look underneath the counter or behind the pedestal to locate any metal clips, brackets, or screws holding the sink in place. These are often tucked away in awkward corners, so be patient (and maybe flexible).
If they’re rusted or stuck, a little penetrating oil can work wonders.
Step 8: Detach the Faucet and Drain Assembly
If you’re reusing the faucet, take your time removing it carefully. Most faucets are held in place by locknuts underneath. Use a basin wrench or your fingers if space allows.
Old fixtures in Vancouver homes can be corroded, so don’t be surprised if some parts need replacing. That’s part of the reno adventure, right?
Step 9: Lift Out the Sink and Clean the Surface
Ready for the satisfying part? Lift the sink out gently; heavier materials like cast iron or stone may need a second set of hands. Set it down on a towel or soft surface if you’re keeping it, or somewhere safe if it’s headed out.
Scrape off any leftover caulk, adhesive, or grime with a putty knife. If you’re reusing the counter or vanity, give it a good clean and inspect for damage or mold. A little prep now will make your new sink installation way smoother.
Step 10: Say Goodbye to the Old Sink (We Can Help)
So now your sink is out… but what do you do with it? You can’t just toss it in your regular trash bin, and good luck fitting it into the back of a compact car.
That’s where we step in.
At Provident Junk Removal, we offer reliable, fast, and eco-friendly bathroom sink removal services in Vancouver. Whether you’re working with porcelain, vessel, cast iron, or something that came out of the 70s, we’ll dismantle, lift, and dispose of your old bathroom sink in a hassle free way.
Just call us at +1 (672) 667-4238 and consider the job done.
Why You Might Want to Hire a Professional Sink Removal Service
We’ve seen it all. That time a client in North Vancouver cracked a marble countertop trying to pull out an undermount sink… not great. Or the family in Burnaby who forgot to shut off the main water valve. Let’s just say their bathroom got a little… immersive.
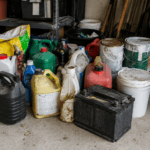
DIY is satisfying, but it can also lead to damage, delays, and a whole lot of stress. Plus, figuring out where and how to properly dispose of an old ceramic or porcelain sink in Vancouver? That’s a headache you don’t need.
At Provident Junk Removal, we take care of everything. From safe dismantling of old bathroom sinks to junk removal services for bathroom renovations, we’ll haul it out of your home and make sure it’s disposed of properly, whether it’s being recycled, donated, or responsibly dumped.
How to Book a Bathroom Sink Removal Service in Vancouver
We get it — you’ve got better things to do than wrestle with plumbing and sink brackets. Whether you’re upgrading for style, function, or just because you’re sick of that 90s beige porcelain, we’re here to help.
Provident Junk Removal proudly serves all neighborhoods in Vancouver and the Lower Mainland, offering same-day service, friendly staff, and eco-friendly bathroom sink removal options that don’t leave you guessing.
And if your project goes beyond just the sink? We’ve got you covered there too. We also offer small demolition services in Vancouver, perfect for bathroom tear-outs, vanity removals, and more.
Call us at +1 (672) 667-4238 and let’s get that old sink out of your life and out of your bathroom.